Showing posts with label DIY. Show all posts

Thursday, March 29, 2012

Paper clay, it's EASY (but not sleazy)

have you tried paper clay?  i did and i like it!!  
i've had some down in my stash for a long time, but haven't really done very much with it.  gee, i wonder why?  i've only started 794 projects the last 2 years-don't ask how many i've actually  finished, maybe 3?  i'm no expert on paper clay, but i did make some cute little pendants yesterday (and finished them today, 'cause i am a procrastinator extraordinaire!).  i'm just starting to realize all the FUN stuff you can do with this air drying clay.
i made an easy little tutorial to get you started too!
grab: some paper clay (duh!). i used "creative paperclay" it's an 8 oz block that i found at Michael's Arts and Crafts.  also a pasta maker (dedicated to crafts ONLY), some mini rubber stamps, mini cookie cutters, a small bowl of water, paint brush, silver paint and wax paper.  if you don't have a pasta maker for crafts, you can always make 2 equal stacks of playing cards that you can put the clay between and roll out.  stack as many as you need to get the thickness you'd like.  i put my pasta maker on the thickest setting which is kinda thick, but not really.  have i mentioned i got a D- in math every time i took it?
i suggest keeping your clay in a plastic baggie and then down inside a little tupperware thingie. 
 i rolled out my clay then made a light mark with my circle cutter before i stamped so i knew where i was going to put my design.  if you cut the circle 1st then push your stamp into it, you can distort your circle.
 push your stamp down in and gently rock it back and fourth.  if you don't like your 1st stamp, wad it up and re-flatten.
 once you get it cut out, take your finger and dip it in the water then run it around the edge of your pendant to get rid of those little edges (i know, this picture sucks!)
 go see my buddy's blog to see what this amazing girl is doing with paperclay
use a pokie thing (i'm technical too) to make a hole in the top.  be careful when you start to move that clay around, you might get some cracks, just use your finger in the water again to smooth it down.
i let mine dry overnight on the wax paper and them got out some silver acrylic paint.
 you can see below how i didn't smooth my clay out real well in the "K" pendant, i should have smoothed it out before i let it dry... easier to fix while it's still damp.  
once the paint dried, i put a little jump ring thru the hole and wrapped a swarovski crystal too, 'cause i'm fancy!
 these really are pretty quick and easy to do, something even your older kids could do (mom of 5, i'm thinking of YOUR girls:).  cute jewelry, gift tags, charms... if you try some, make sure and leave the link in the commets!
i gotta run, mad max 2: the road warrior is on!  happy thursday friends!

Friday, January 6, 2012

Pinterest DIY's

have you found the pinterest crack yet?  i have and i'm willing to admit i have a problem.  i like to log on while darling is getting ready for school, i like to check after i get her on the bus, throughout the day and then again before bed.  good Lord, i don't want to miss anything fabulous!  don't call dr. phil yet, i'm still bathing, using the toilet IN the bathroom, running, feeding my family, crocheting and shopping for cute outfits, it hasn't ALL gone downhill around here...yet!  today, i'm going to share some really cute DIY's i've found there.  if you can ever get off pinterest to make them, that would be awesome!

1. distressed photo canvas

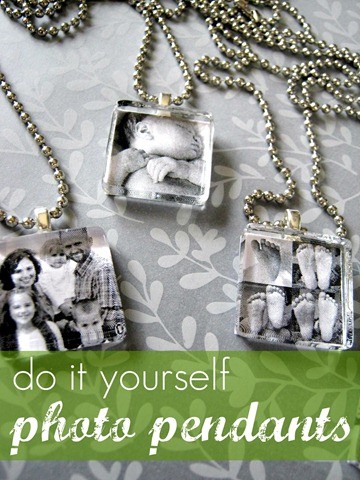
2. DIY Photo Pendants

3. Mason jar candles
**i'm going to give you a little bonus info that i also learned on pinterest: instead of buying wax, melt down your old candles in jars, you know, the one where the wick is gone but chunks of wax are left.  Pour layers of scents that go together and use up that usable candle wax!**

4.  Bleach pen t-shirts

5. Paint chip garland
(don't call me if home depot kicks you out!)

7. Crepe paper rosettes

8.  Subway art
(look for ALL  kinds of saying that fit your home on.... pinterest, where else?!)

9. Open weave beanie (crochet)

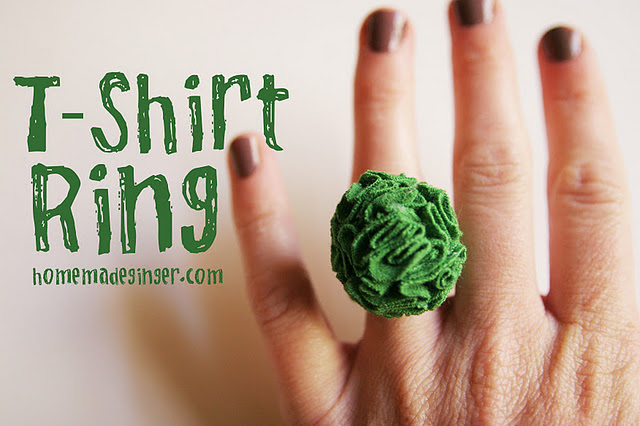
10.  t-shirt rosette ring

i hope i've listed something you might like to try, but even more than that, i hope i've helped you decide to come along with me and waste even MORE time online!! 
you
are
welcome!
if you need a pinterest invite, email me at: chinamommy_04@yahoo.com
you can find me there under the name:
chinamommy S
have a great weekend!


Wednesday, December 7, 2011

DIY Christmas mirror ornaments

darling and i made these the other night...AT night.... hence, the really icky pictures!  but, disregard the pics and make the easy-peasy ornaments!
Here's what you need:
✪ package of mirrors (easy to find at places like hobby lobby!). for every 2 mirrors, you'll get 1 ornament. the bigger mirrors can be heavy, so if you have a REAL tree (like we do this year) make sure they're not so heavy they pull down your branches.  though hard to believe, i had a whole lunch meat container FULL of different sized mirrors (don't worry, the turkey was gone).
✪ E-6000 glue (hot glue is not good for this craft!)
✪ silver string or fishline or whatever you want to use (we used some silver elastic string)
1.  put some E-6000 on the back of 1 mirror (this stuff smells NASTY)
 2. put a loop down into the glue, smear it around a little to make sure the string gets nice and gluey.
 3. stick the other mirror on and press GENTLY! be a little careful, these ARE glass!  gosh, do i even have to say that? you're smart!! just like those tubes of cream for vaginal yeast infections that warn you not to eat the stuff!  thankfully, they say that as i've often contemplated using it as toothpaste! geesh....
 4. hang on tree!  i find that more is more and more is better in the case of mirror ornaments! i say add so many that people feel like they need a polyester jumpsuit and ABBA playing!
~Merry Christmas~

Tuesday, November 15, 2011

Thanksgiving ideas and...Shabby Apple deal-of-the-day!

1st GREAT idea for Thanksgiving?... save 25% on this dress to wear to your feast!
go HERE! to save 25% off the Cider dress and make SURE you use this code at checkout: "day4"
isn't it cute?
this code is good ONLY today, the 15th!!

2nd idea: an easy-peasy Acorn Tree DIY!
Acorn Tree?, i think that's called an oak tree, but not today!
grab: a branch, leaves, glitter, acorns (you hoard them like i do don't you? if not use felted acorns you can buy on etsy!), twine, glue gun, a tall (kinda heavy) vase and some mod podge! 
 you really want some dry floral foam down in your vase to anchor your branch.  i squeezed some glue on the branch before i stuck it in the foam and then let it sit while i moved on to the glitter steps!
 what is a holiday without glitter? a lame holiday, that's for sure!  i pulled the caps off the acorns (make sure you lay the caps next to the acorns, i was going to put nuts, but i know how SOME of you girls are...). paint the caps with mod podge and sprinkle with glitter!!!!!  i used Martha Stewart glitter in brownstone. 
 while the glitter was drying i tied little bits of twine to the branches and sprayed it with...
 clear acrylic spray. i don't know why...to seal it?!  
 before i glued the caps on, i glittered the acorns with Martha Stewart glitter in turquoise, 'cause TURQUOISE acorns, duh!!  i used the glue gun to glue the caps on and....
 i put a spot of glue on each cap then pressed the twine into the caps.  i also added some leaves around the base of the twig.
 purty, hun?
this isn't that hard, and you wouldn't HAVE to add the glitter, but why you wouldn't i have NO idea!!  it does take a bit of time to add the glitter and let it all dry, but trust me, while it's drying you'll have plenty of glitter to clean from every inch of your bod, every corner of your kitchen, and (if you're lucky) off the dog!

Wednesday, October 5, 2011

DIY Mercury Glass, Pottery Barn Knock-Off

several months ago i was watching the nate berkus show.  a lady was on showing the wonders of this product..."krylon looking glass".  she was showing how to make faux mercury glass with old jars.  i knew right away i was going to need a can (or 12) of this stuff!  i went on the hunt but didn't find any until the other day when i saw it at hobby lobby.  it runs about $12 a can, so make sure you have your 40% off coupon. i had 3 glass squares full of rocks in one of our bathrooms... fancy, hun?  since i was not in away way impressed or attached to the jars of rocks i knew these had found their new purpose!
if you wanna give it a try, here is what you need:
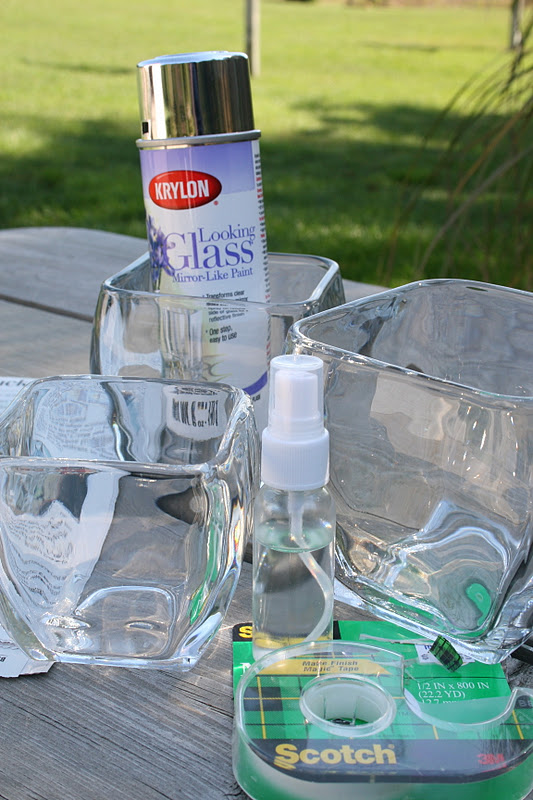
krylon looking glass, glass jars (any kind of glass jars will do!), water in a spray bottle, paper to wrap the outside of your jars, and tape (to hold the paper on, duh!).
 get wrappin' so you don't get the outside all yucky. you want to spray this stuff on the opposite side of what you're going to see, so spray down inside.
 spritz with water (i didn't spritz enough) and then give your glass a light coat and let dry for 1 min. ★repeat this step 5 times.★
 make sure your trusty sidekick is tied to the picnic table so he doesn't chase the cats and make you scream like your white trash neighbor who was screaming at his kid all afternoon.  oh, you don't have a white trash neighbor? well, aren't you fancy?
 stand back and enjoy the (cheap) beauty of it all.  if you're like me, you will also stand back and realize you really didn't spritz with the water enough!  don't worry, this will NOT be my last project- watch for an entire house of mirrorifficness! shut up spell check, that is too a word!
also check out this cuties blog (she gave me the water spritzing tip!)
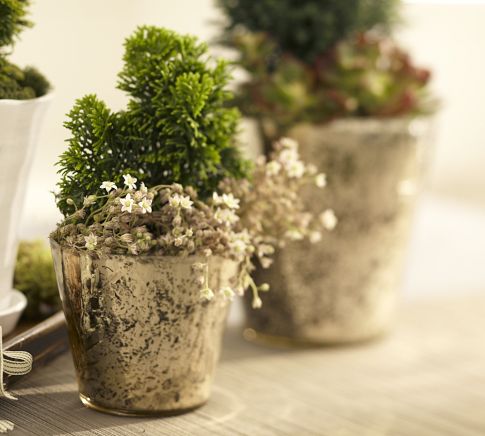
(the water gives it that spotted vintage look like the ones below from pottery barn)
you can also just shop pottery barn if you missed out on the DIY gene!
enjoy!

Thursday, September 8, 2011

DIY Easy Iced Coffee Goodness

Ok, I know not everyone loves coffee (dorks) and even those that do enjoy a cup O' Joe, may not enjoy ICED coffee, but you should!  Let me share with you a tasty little treat I love to make for myself during the 3 months of warm weather we enjoy here in Michigan.  This is how this mama makes it:
1. Brew some strong black coffee over ice (I like to use dark roast because it's going to get watered down.)
 2.  Add some more ice and some half and half... or if you're lame, skim milk...or if you're Aunt Boozie, add Baily's.
 3. Get out your "Silver Bullet", realize your Mister has left it COVERED in tomato gunk and vow to just shut up and wash it yourself because he was making chili you are going to enjoy all winter and he's the one out slaving away at a real job while you make iced coffees and blog the days away...
 4. Blend it.
 5. Put a bird on it and enjoy!  I mean "Stick a straw in it and enjoy"!! 
Mmmmm....
(I like to blend it, 'cause i'm fancy!)

Friday, August 26, 2011

DIY Cupcake Stands from old dishes.

this Sunday,  the mister, darling and I are throwing a 50th wedding anniversary party for my parents!
50 years, no lie!!  they are among the few.
 i ordered "professional" cakes (due to the fact that my mother dropped some pretty obvious hints like "if you order cake, i like clara ____'s cakes".  my mother and her discriminating taste is fodder for another post). i also made SEVERAL mini cupcakes since I really am not sure how many people will show up-YIKES!
I knew i wanted some cute displays for the mini cupcakes but since i didn't have the carpenters from "Cupcake Wars" at my disposal, i went to goodwill.
If you wanna make your own, you're going to need:
1. saucers
2. plates
3. glass candle holders
4. E-600 glue

 these plates happened to have that little lip for the cups, but since they were iridescent, i knew they must be mine!

i found these glass candle holders for .99 each

Step 1: put the glue on the edge of the candle holder and press down onto the plate, let this set up for several hours.  after the plate is set, put glue on the other end of the candle holder and press the saucer into place.  that's it! 

because mine had that "lip", i had to off set my saucers, but i didn't think it made a big difference.

at the party we'll be serving mini cupcakes so i didn't need huge plates, but you could do any size you need.

i think they turned out pretty cute!
If you make some, let me know!!
Get yourself over to my pal Angela's blog for another cool DIY!!  She'll tell you how to do antique a mirror!!
pickles on pizza
**don't forget to go to Tuesday's post and enter my my memories suite 2 software GIVE-AWAY**
Related Posts Plugin for WordPress, Blogger...