Showing posts with label Halloween craft. Show all posts

Friday, October 8, 2010

Top 10 Candy Corn Treats!

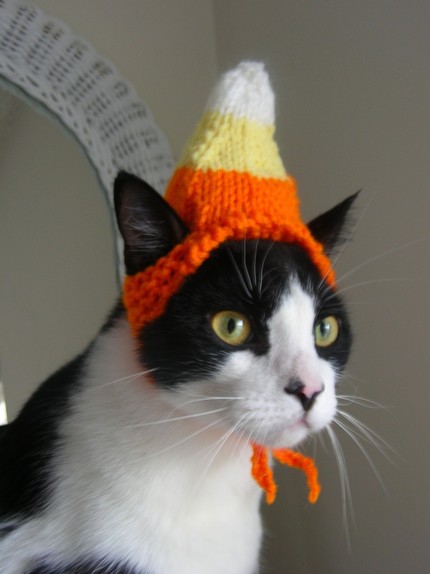
1. Oh, my how hilarious and CUTE is this candy corn cat hat??  Check out her shop for more of this goodness!!

2. Custom made candy corn outfit for your little sweetie!! Cute, cute, cute!!

3. Oh, my!!! A printable party!! Click the link below to see for yourself the most fabulous printable party supplies- STUNNING!!

4. I have one of my own lip balms from this shop and let me tell you... they are DELISH!!  I'd like to order one of everything-toasted marshmallow, lavender lemonade, creme brulee...!!!
PS: I have the blackberry lip tint- YUMMO!

5. Click below to go to her shop full of gorgeous yarns!!!

6. Oh, wait till you see the amazing outfits in the shop below, click the link and see for  yourself, they are amazing!!

7. Cute over load!!

8. Trust me.. you want to click this link and see the other gorgeous goodness in her shop...GO NOW!

9. Seriously adorable cake toppers...you have GOT to see what else she has, click below!!

10. Candy corn ornaments!! Cute, hun?

Whewww... that is some CUTE candy corn goodness, am i right?
Seriously, check out the other goodies in their shops!!
and by the way... i hate candy corn to eat! haha!
BUT: i love how it looks!!

don't forget, the deadline for my baby hat drive is coming QUICKLY, so here's the info:
a little plug about my BABY/KID HAT DRIVE
As most of you know, my daughter was adopted from China and I left a little piece of my heart there.  I'm collecting hats to keep the children and babies warm in the winter.  Many live in orphanages that are without heat.
1. make a baby hat, toddler hat, or kid sized hat 
(you can take the non-crafty way out and buy one if you must)
2. Send to:
David Shellenbarger
c/o chinamommy
146 E Main
Caledonia, MI 49316
3. I need them in my hot little hands BY Oct 31, 2010.
4. I'll take care of shipping them to CHINA this fall.
any questions- please feel free to email me!!
chinamommy@yahoo.com


Friday, October 1, 2010

Apple Crisp and a Halloween Sneak Peek...

Hello October!!
Ok, so I'm not a fan of fall like the rest of ya, but I do LOVE apple crisp (which is a fall thing, right?!).
I made a recipe a while back that frankly, SUCKED!  So I googled apple crisp and came up with one that had over 2,000 positive reviews and guess what?
They were right!
So, here it is:
(one side note, I am not so much of a sweet person and this is freakin' SWEET! I cut my white sugar to 3/4 cup and when I make it again, I'll cut it to 1/2...FYI)
Apple Crisp II
by Diane Kester
(from allrecipes.com)
Preheat over to 350
In a 9X13 pan:
put in 10 cups of apples (I like green granny smith).  mix 1 cup white sugar, 1 TBS flour, 1 tsp cinnamon and sprinkle over the apples.  Pour 1/2 cup water evenly over this.
In another bowl combine:
1 cup quick cooking oats, 1 cup packed brown sugar, 1/4 tsp baking power, 1/4 tsp baking soda and 1/2 cup melted butter.  Mix together then sprinkle over the top of the apples mixture.
Bake at 350 for about 45 min.
Mmmmm, not only tastes great, your home will smell FABULOUS!
Let me know what you think!!
PS: she suggested serving it with rum raisin ice cream or a BIG dollop of freshly whipped cream... Ok, anyone that knows me KNOWS that is over the TOP for me!!  But if you like all the extras, GO FOR IT!
IF you don't know me, I am the most plain/bored with food eater ever.  My cousin use to say she hated to go places with me because I always forgot to eat.  "No, I don't want sauce on it, I don't want extra gravy, and I don't want you to add_____."
I eat healthy, I eat to live, I don't live to eat, but...
Warm Apple Crisp steals  my ❤ just a little!
Has anyone started decorating for Halloween?!
I've never been a big fan, but now that I have a child...
LOVE IT!!
Remember this guy?
and these guys?! I did the glitter skull tutorial last Oct- anyone give it a try?
They survived pretty well in plastic bags, missing a bit of glitter, but just a bit...
 Ok, how weird is my wall color in these pics?!  Speaking of pictures...
Canon is sending me some software so maybe now I can connect big girl camera to my mac?!
and... guess who just got PHOTOSHOP!!!???
Yeah, don't get all excited it could take me years to learn it.  I sat last night staring at the screen like a deer into oncoming traffic!!  IF you know of some good online photoshop tutorials, Please share!!
Ok, off to JoAnns cause I ran out of yarn less than 100 stitches from the end of Darlings newsboy/girl hat...well, of course I did!!!!
Have a fabulous weekend and make some apple crisp!
Baby Hat donation deadline coming SOON...Oct 31st!
**Info posted on the weekends for you newbies!**

Saturday, September 25, 2010

Boo!! Another Ghost DIY!!

As much as I hate to see summer come to an end, it's that time of year again...

 Head over to the blog of Heidi Kenney (My Paper Crane) and get her cute tutorial for these little felt ghosts!
while you're there check out all her ADORABLE soft art!!
Have a fun fall weekend!!

Wednesday, September 22, 2010

DIY Halloween Ghost project!!

Let me start by saying I DID go to my running club Monday, let me also say it was cancelled... Yes, I am going back again next Monday because they ARE meeting and they ARE running....4 miles!  The guys says "you can run 4 miles can't ya?" and I said "I guess we'll see, won't we!".  I just got off the treadmill...i can do 2, how hard can 2 more be?
Anywhooo... moving on!  
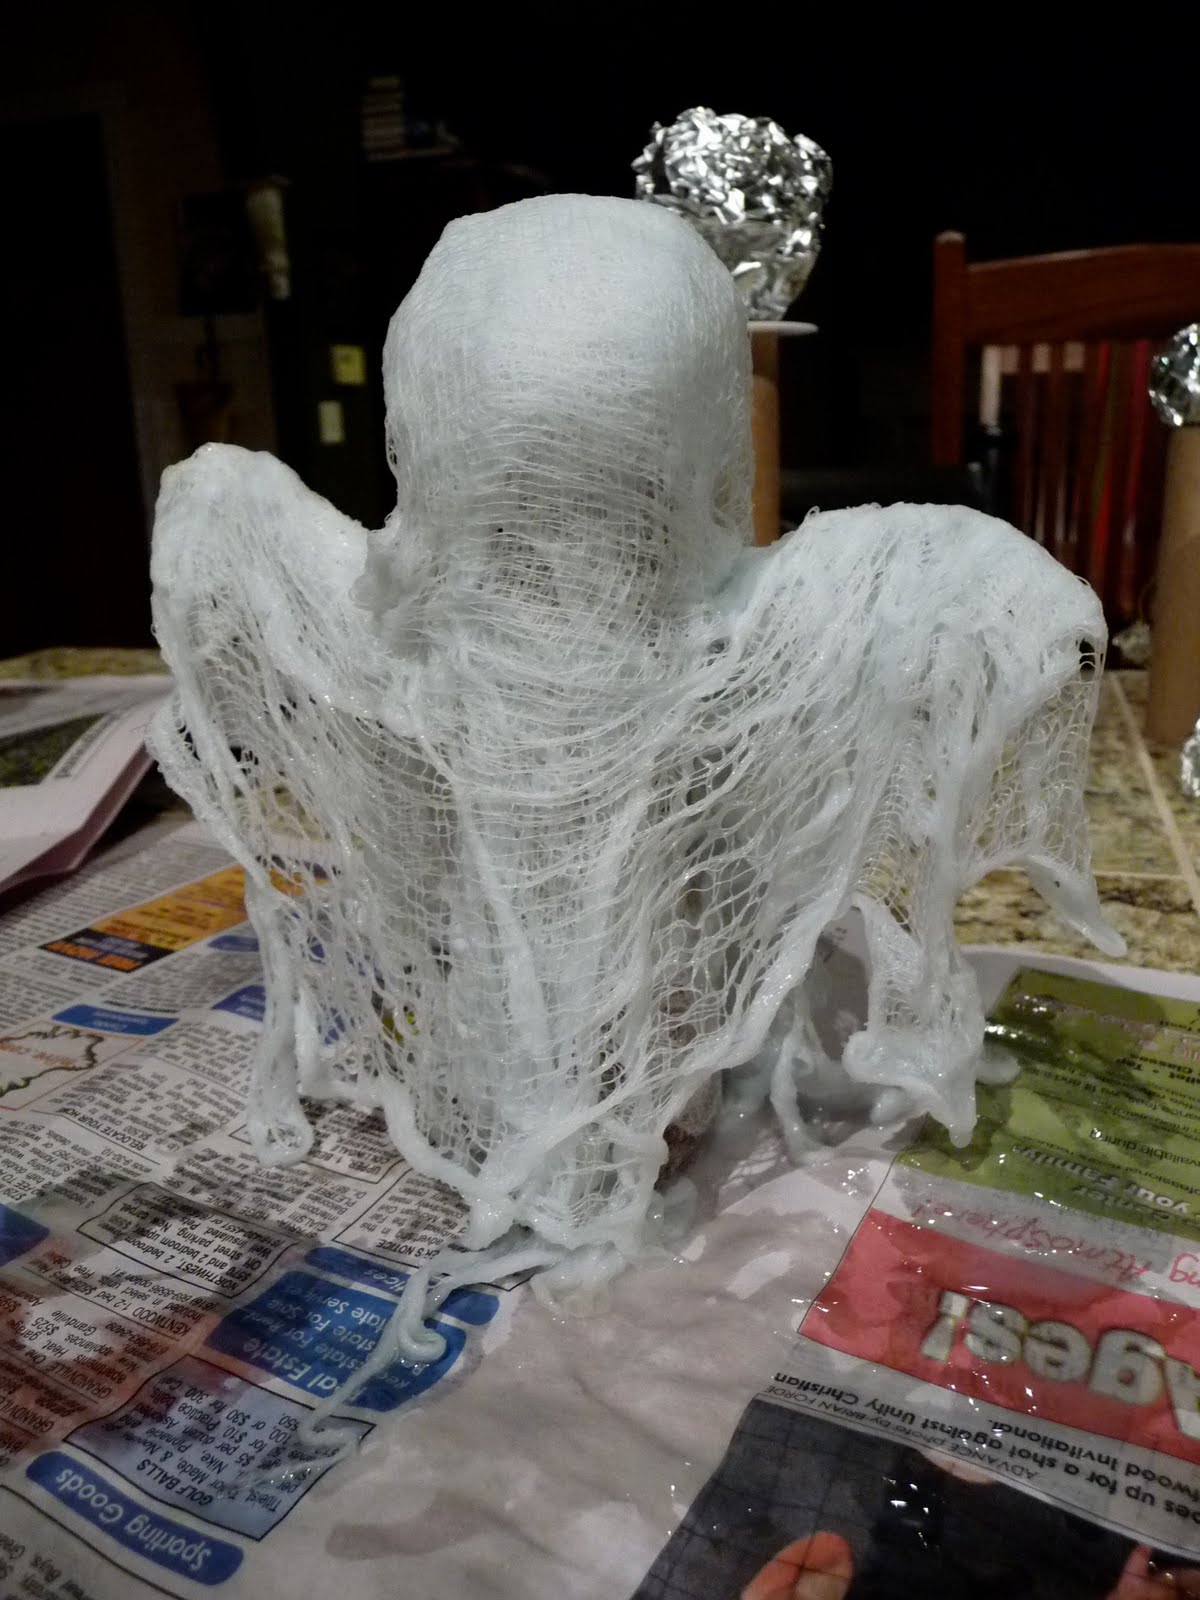
The cheesecloth ghosts I promised!!  Darling and I worked on these last night and if you have little ones, or hyper ones, or you're PMSing... run 4 miles instead!
This turned out to not be so great for little ones.  Darling is 7 and pretty mature so she did ok, but it is MESSY thanks to liquid starch!
Grab your supplies and lay down a layer of newspaper or better yet a cheap plastic table cloth!
tp roles, liquid starch, foil, wire, small bowl, wire, wire cutters, cheesecloth, tape, pointy thing and white spray paint (yeah I added 3 items after we gave it a go!).
Take your foil and make a ball, then take another bigger piece of foil, wrap over the head and and pull it down to a point.  Darling loved the foil wadding, so this is the part kids can help with (unless you have PMS then just do the whole thing yourself or someone is going to get hurt!).
The long point will go down in your tp tube
then take your "pointy thing" and put a hole on each side of the tube
Feed a piece of wire through the hole (you may have to remove your foil and then re-wiggle it down in around the wire).
I found that it was best to bend the wire up and tape around the entire tube...
add some foil to the "arms"
At this point it IS best to spray paint the whole thing white, I found the cheesecloth covered better, but you do NOT have to, you'll just have to add more layers to cover the foil and the brown paper.  Trust me, you wanna spray it!
Now this is where it gets MESSY!
Pour the liquid starch into your bowl (not your bowel as I've been known to type-ha!).
Those plastic lunch meat dishes work perfectly!
Fill it about 1/3 to 1/2 full.
Take your cheese cloth and drape it from front to back to see how long you need to cut it to cover from the front, up over the head, and down the back.  You'll also need to cut about 4 smaller pieces to drape over the arms- however long you want it to be- NO rules with this craft, well, except:
**don't drink the starch, chew on the foil, or do this with kids if you have PMS!**
After you have your pieces cut into strips, make sure you peel it apart- the cheesecloth is very thin!
Dip the cheesecloth into the starch and pull it up between your 2 fingers to ring it out.  It's a bit tricky to spread this out once it's wet, but you CAN DO IT!!  Lay it from front to back.
It doesn't matter it it's a bit long, better than too short!!  It looks more ghostly that way!  See how long I did the arm pieces?  The more raggy they hang, the better, so don't spread it all out flat!  Perfectionists-RELAX!!
It IS best to do several thin layers of cheesecloth than to get lazy and use it without peeling it into single layers- trust me!
Now, after you've covered it with a couple layers, pinch the sides in to hide the TP roll, cover the arms and add a few more layers so it's ALL covered.  After this you'll want to set them on something to dry, a cookie sheet with wax paper or ceramic trays work great!  If you don't have a ceiling fan going or a small fan, you might want to let it dry between layers.  Personally once I got into that starch, I just wanted to finish it up!!
We are going to try a test run by adding some glitter and felt eyes... I'll post the final finished project when it is...
final and finished!!
Boo! 
IF you make these, send me a link and I'll add you to the next post!

a little plug about my BABY/KID HAT DRIVE

As most of you know, my daughter was adopted from China and I left a little piece of my heart there.  I'm collecting hats to keep the children and babies warm in the winter.  Many live in orphanages that are without heat.
1. make a baby hat, toddler hat, or kid sized hat 
(you can take the non-crafty way out and buy one if you must)
2. Send to:
David Shellenbarger
c/o chinamommy
146 E Main
Caledonia, MI 49316
3. I need them in my hot little hands BY Oct 31, 2010.
4. I'll take care of shipping them to CHINA this fall.
any questions- please feel free to email me!!
chinamommy@yahoo.com
and don't forget...


Thursday, September 16, 2010

Ugh, sometimes it's so confusing!!

I've wanted to give chinamommy an update for a LONG time and I don't mean just changing the background!  I want to use all those cute fonts and I want the set up to be different, but... I am elderly in the world of computers and technology!  I got a wonderful book:
I went to this site and got FREE FONTS (that are adorable!)
I got this big girl camera

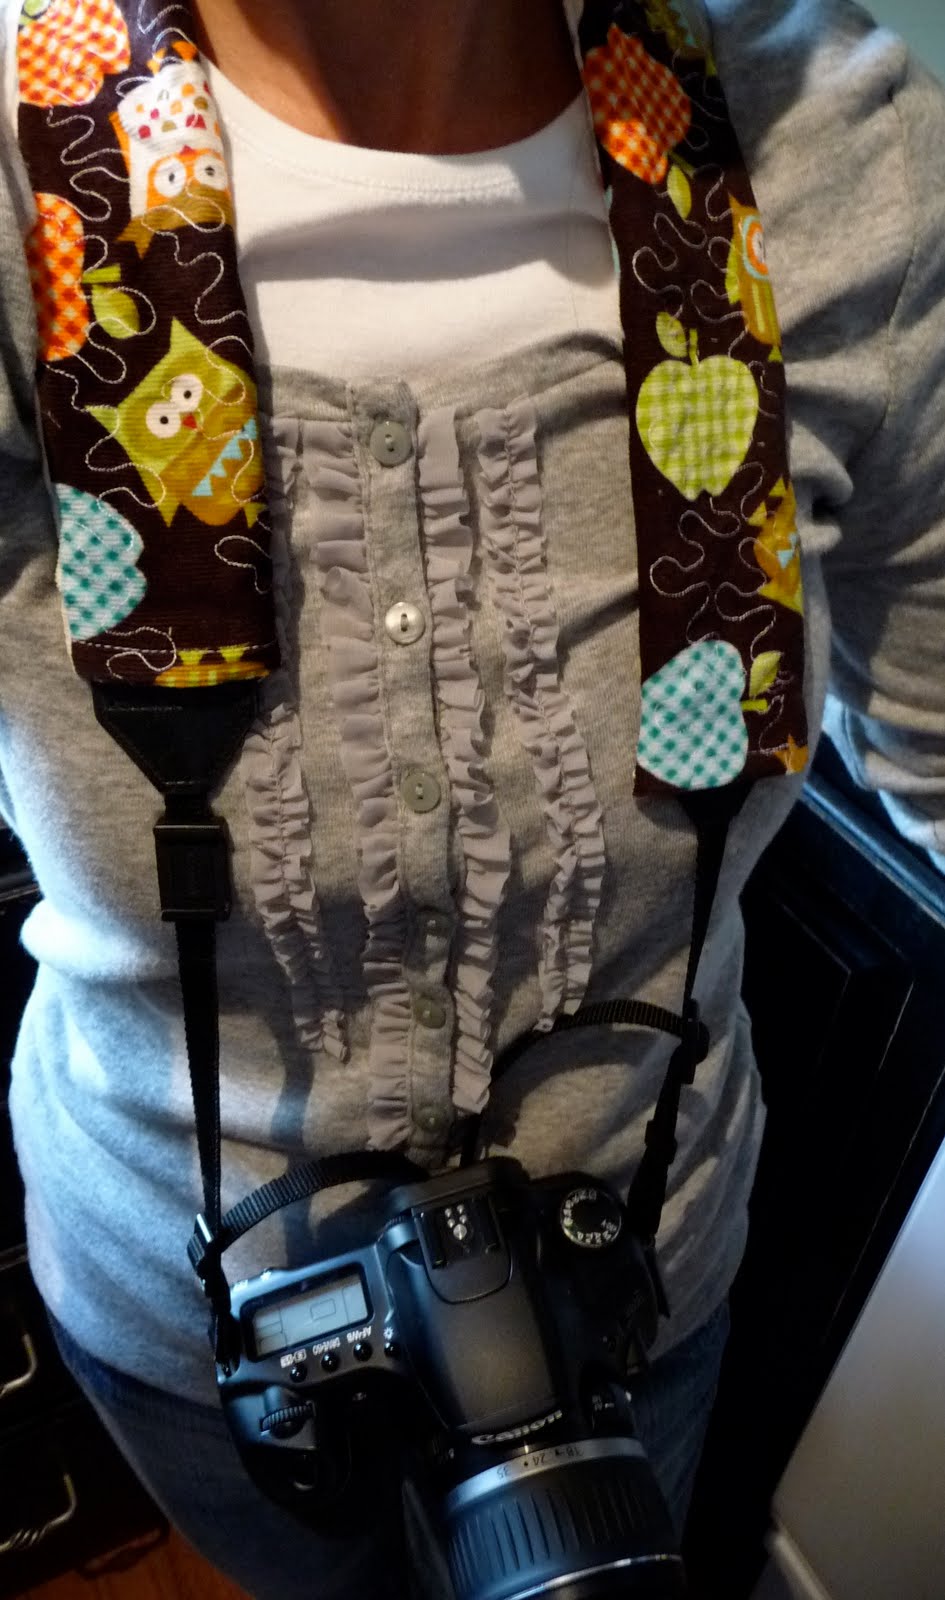
made this cute strap

read tons of how-to's, tried to get my pictures loaded onto my mac, and freaked out because LOUD bagpipe "music" was playing on the tv in the background.
So instead of giving the blog a make-over, I made a Bento for Darling.
 this is ONLY the 1st little one I've put together, so as I gather more supplies (cause you know I WILL!)
I hope they'll be a bit more spectacular!
Oh yeah... the blog make-over!
Everything is just so hard for me to figure out and there are some fabulous tutorials out there but I just need to devote an entire day (week??) to doing NOTHING but learning this stuff!  I'm going to keep plugging away because I really do want to make this blog bigger, better, and, of course, CUTER!
Stayed tuned next week and I'll show you how to make this:
IF you're interested, go grab these supplies this weekend:
TP rolls, foil, small dish, wire cutters, thick wire, black felt (small amount for eyes/mouth), liquid starch and cheesecloth!
(and a can of white spray paint is really going to help!  after doing the 1st one last night, I'm thinking this will make things a LOT easier.)
See you next week with the how-to!

Thursday, November 5, 2009

Halloween Bargains galore!!!

This room...
With this chair:

Oh boy, do i owe LuLu of Coastal Sisters a big shout out & thank YOU!!! This chair is in her front entry - she featured it on her blog with all her DARLING Halloween goodies. I left her a comment telling her I needed THAT chair! She was so sweet to let me know where it's from & the fact it was 1/2 OFF.... Clearance- i love that guy!!! So, if you know of anyone that needs a chair like this send them over to JC Penney online outlet store!! What good stuff!! The reviews on it were fabulous & if you've been over to LuLu's blog- you know what great taste that gal has! I never think to check JC Penney... guess it was just a place my grandparents always shopped, but this site has amazing stuff!!
I know Halloween is over, but isn't that the BEST time to find good stuff at great prices? Clearance strikes again!
I stopped at Michael's (craft store) yesterday & grabbed a bunch of goodies for next to nothing!
You can't really see it, but this tassel has clear crystal beads mixed in the fringe.
I was getting ready to tell you this was a deal except it only came with 1 "P"... then i noticed they were stuck together- ha! I think I'll add to this banner & make it more 3-D for next year!
I grabbed 2 of these guys:
This is another silver sparkly goodie that i think I'll add to... maybe a crepe paper collar or a hat?....
and then there's Bob... such a lazy fella!
Here he is riding away from the little dog that won't quit licking his foot...
Bob- don't you dare NOT replace the toilet paper roll!
I have a feeling Bob & I are going to have a lot of good times together this winter! He's the kind of guy you can really pour your heart out to!
Have a great day- I'm off to the treadmill. I would add "ug" to that, but I'm trying to do positive self talk "i love to run on the treadmill, it's so fun, I can't wait...." you know, crap like that.
Tomorrow: Good Stuff Friday & a review of my new glasses...

Monday, October 12, 2009

My new BFF Martha...

Yes, Martha & I, we're the new "it" couple! Actually i think Martha would hate me.... me & my potty talk, my lack of sheet folding skills, my ignorance in the kitchen... I am NOT Martha's kind of gal. I am quite sure if i was ever was on her show (it would have to be for a craft of some type) i would totally get snapped at by her for not having my supplies organized. I found this great Halloween Glitter craft on Martha's site & knew Darling Daughter & I were going to have to give it a go!!
I ran to Hobby Lobby & what do you know- Glitter was on sale 50% OFF!--MARTHA STEWART glitter!!!! I was so happy i cried... not really, but i cuddled the package on my lap the whole way home like a new baby, except if it really was a new baby i wouldn't have cuddled it on my lap, i would have strapped it in a car seat, but i digress...
18 bottles of pure glittery joy!
I had all the supplies for our Halloween Martha Project- oh was i happy! It's the small things in life for me, except for the Range Rover I'm dreaming of, but again... i digress!
So if you'd like to make your own glittery skulls here are my instructions & these are the good ones because i did it wrong the 1st time & made a huge glittery mess! Let's just say we all spent the weekend looking like #1 customers at the local strip club- all our little faces covered in glitter (along with the rugs, the chairs, the kitchen table, the counters, the cell phones... you get the picture!).
1. Gather your supplies:
glitter (IF you're not using the Martha glitter, shame on you! Grab Ultra Fine glitter!!)
SPRAY adhesive (I used Elmers & it was VERY easy to use & did a great job)
plastic skulls & bones (Jo Ann's had the best skull it was $9.99 & had 1/2 off, bag of bones, bag of mini skulls & cheap skulls at the $1 store- these are "ok" & for $1 were the best deal, smaller detailed skull $1.99 at Target)
chopsticks/skewers
egg crate/bucket of sand/block of Styrofoam
dremel or knife
newspaper
2. pick 3 colors for your color scheme. I went with greenish gold tones, another idea: black, purple & orange. 3. make sure the skulls/bones have a hole in them. IF not use your dremel & make a small hole in the bottom of each- big enough to put a chop stick or skewer in. If you don't have a dremel use a knife & do NOT stab yourself in the hand, unless you're looking for extra gore in your display... Seriously, be careful! Most of these already had a hole in them. i drilled a hole in the tiny skulls because i wanted 1 in the bottom & they had one in the top.
4. put each skull/bone on a chopstick or skewer
5. take them outside & heavily coat with SPRAY adhesive, not so it's dripping off the side, but made sure you have a nice thick even coat of glue.
You can see in this picture we started by painting the glue on with a foam brush.... trust me, stick them on a stick & SPRAY!
6. Hold the sticky skull over your newspaper & pour the glitter. If you don't have large bottles of glitter you may have to pour it back & fourth a few times.
7. After you get them glittered stick them in the egg crate to dry. You have to be a little careful & spread them out so you don't tip the egg crate over. You can also use a bucket with sand, or a block of Styrofoam to stick your skewers in.
This is the one from Joanne's it sat flat & was the 1st one i did by brushing on the glue... I wish i would have used the spray adhesive! You can brush the glue on but it takes SOOOO much longer! You have to wait for each section to dry & then it's harder to brush new glue up to meet the area that's already dry without knocking off some of the glitter, your fingers tend to "tear" the glittered glue areas too. This made a REAL mess!!
Here's our final result:
The one in front is the most expensive skull & i really think it turned out the best. I think the $1 skulls look constipated, but that's just me... (some of my skulls in this picturelook orange, but they are actually gold) The $5 had a lot more detail & the deep eye sockets... guess it just depends how much you want to spend & how realistic you want them to look. Have fun & get ready to get glittery!
If you make these, I'd love to see them!
email me your projects at:
chinamommy_04@yahoo.com
Related Posts Plugin for WordPress, Blogger...